

Giving students the opportunity to learn about and use a sheath knife can be a very powerful learning experience. It can result in great conversations regarding risk, responsibility and discipline.
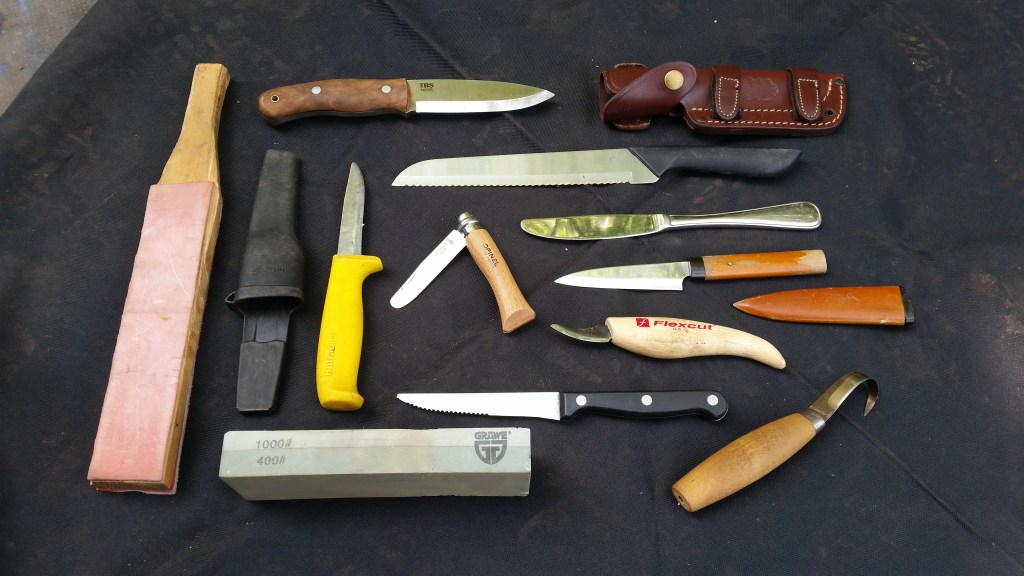
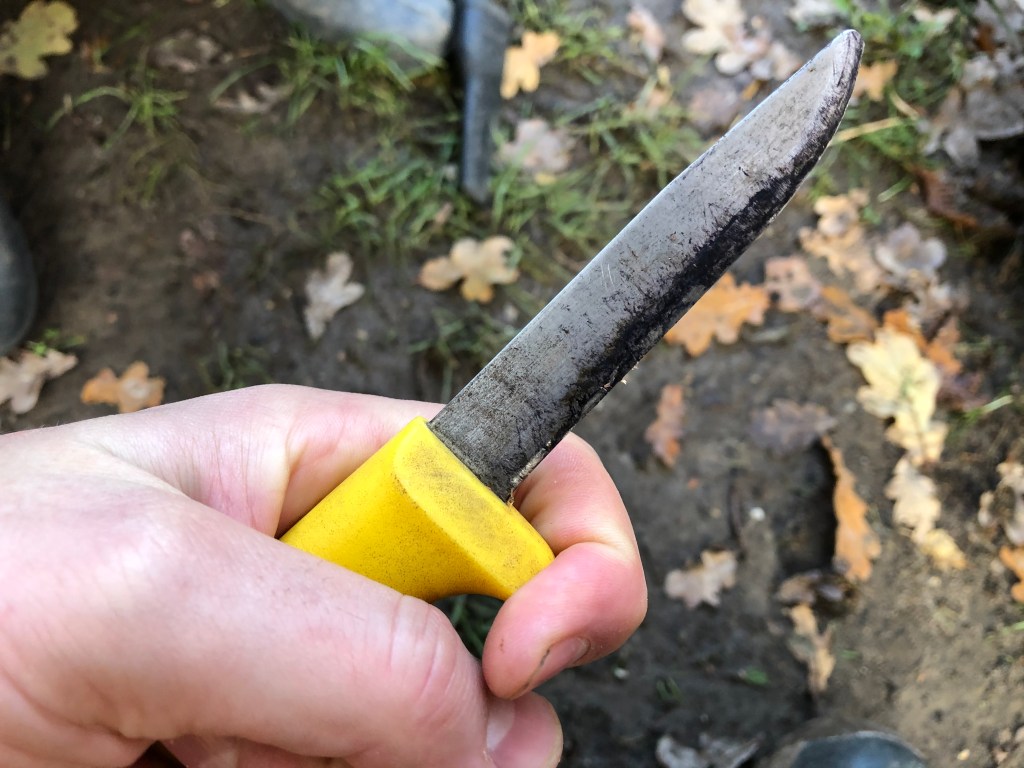
The knife that we currently favour is the Hultafors Safety Knife. This is a fixed blade sheath knife which has a rounded end to “avoid sticking injuries”. For more information about this knife and why we love it, check out our tool recommendations page.
1) What do we know?
We start with a selection of different knives. When have the students seen or used of them before? Do all of these knives do the same thing? Through discussion, we eliminate the knives that are deemed unsuitable for whittling and end up at the sheath knife.
Use this opportunity to identify the different parts of the knife, including the sheath. Invariably, there will be the student who owns a folding pocket knife/Swiss Army Knife and has done all of this before with Grandad. You might have to move over…
2) The Space Bubble
When using a sheath knife, or any tool, students should have a space bubble. Also known as a safety bubble or blood bubble, it’s a simple idea that should be used to ensure that other people are at a safe distance when a tool is in use. As a general rule, the size of your space bubble should be your two arms outstretched, plus the length of your tool. When choosing where to use their knife, they should keep in mind that if they go next to a path, they will become quickly frustrated every time someone walks through their space bubble and they have to stop.
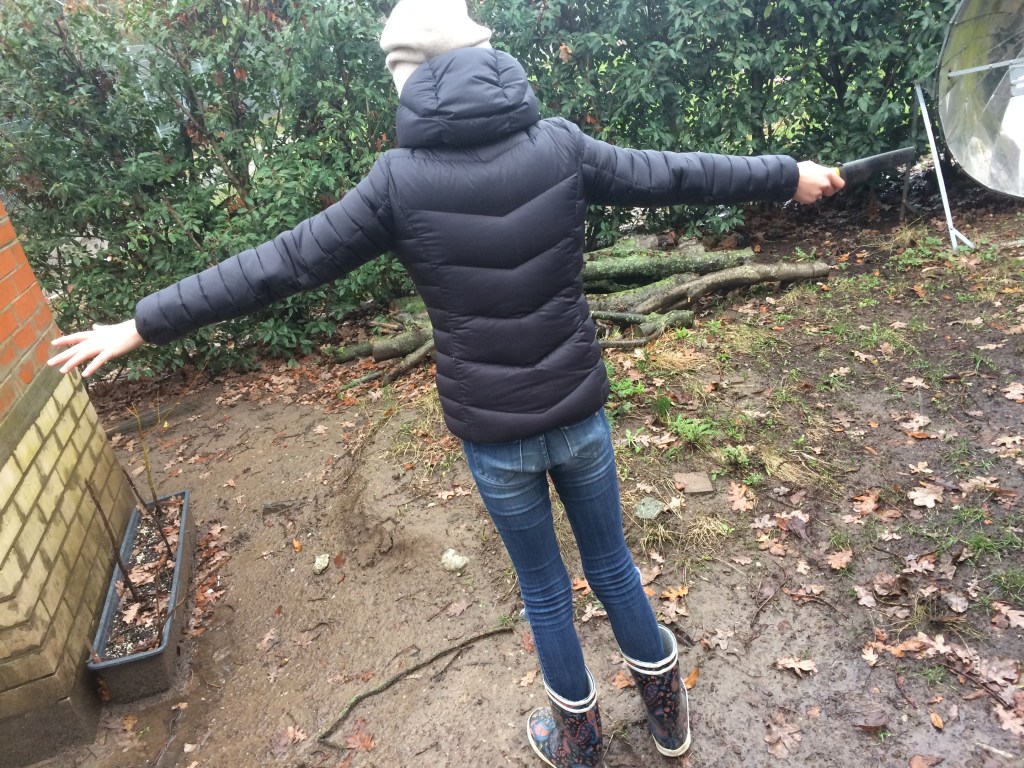
Your space bubble chat should include:
- How big.
- Location.
- What to do if somebody enters your space bubble.
- Awareness of other people’s space bubbles.
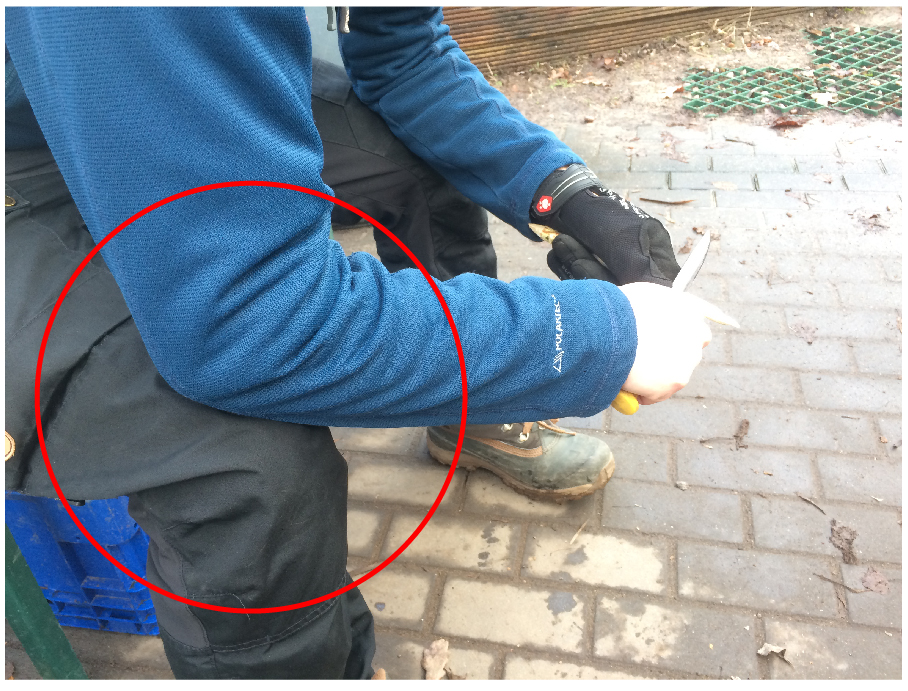
3) The Position
In the past, we have allowed either carving to the side or carving with elbows on knees. Either way, we try to avoid using a knife on or near the legs. The argument for this is to avoid injury anywhere near the femoral artery in the upper part of the leg. Accidentally put a hole in that important tube and everybody is going to have a bad day.
4) To glove, or not to glove
That is the question. There is an on-going debate around whether or not a glove on the stick-holding hand is necessary when using a sheath knife. It is possible to cut through a glove and it can provide a false sense of security. That being said, it can offer a small amount protection from a close shave and it can serve as a reminder to keep the stick-holding hand out of the way of potential danger.

Currently, we are asking students to wear a glove on the hand that is holding the stick. If you choose to go the same way, this can take a little time to get used to and you will find yourself having to remind students of the correct hand.
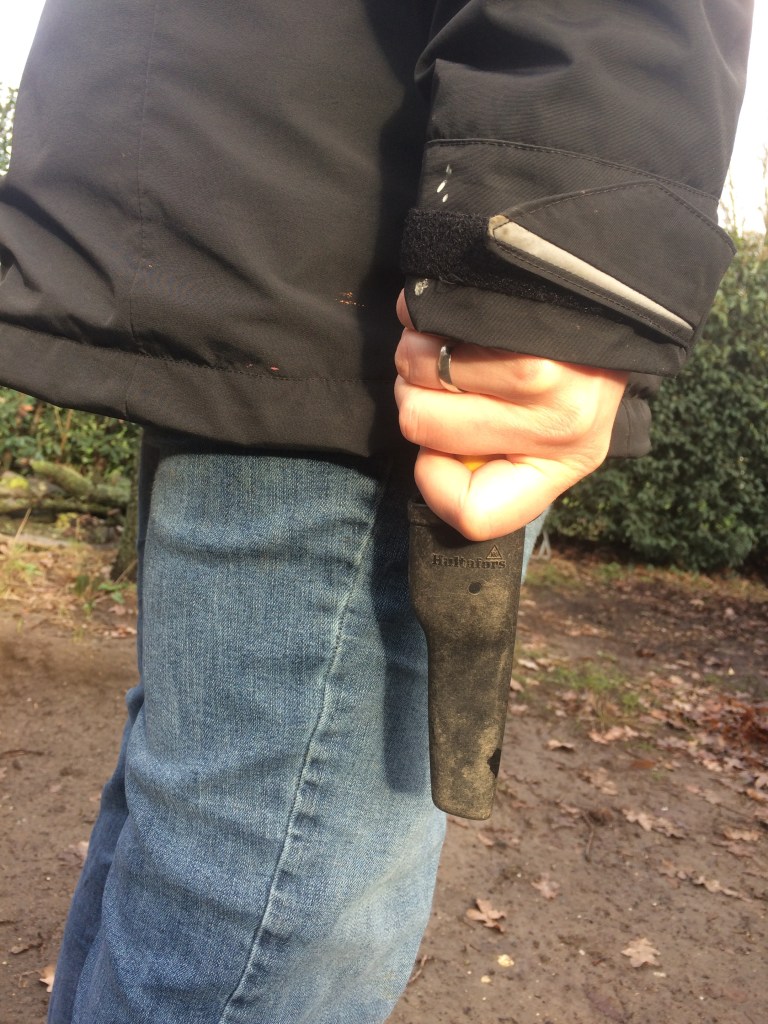
5) The Sheath
When the knife is not being used, it should be in its sheath. Sometimes, students are so excited to show you their successful whittling project that it ends up looking like they’re trying to mug you. When carrying it, knife in the sheath. When showing your project to a friend, knife in the sheath.
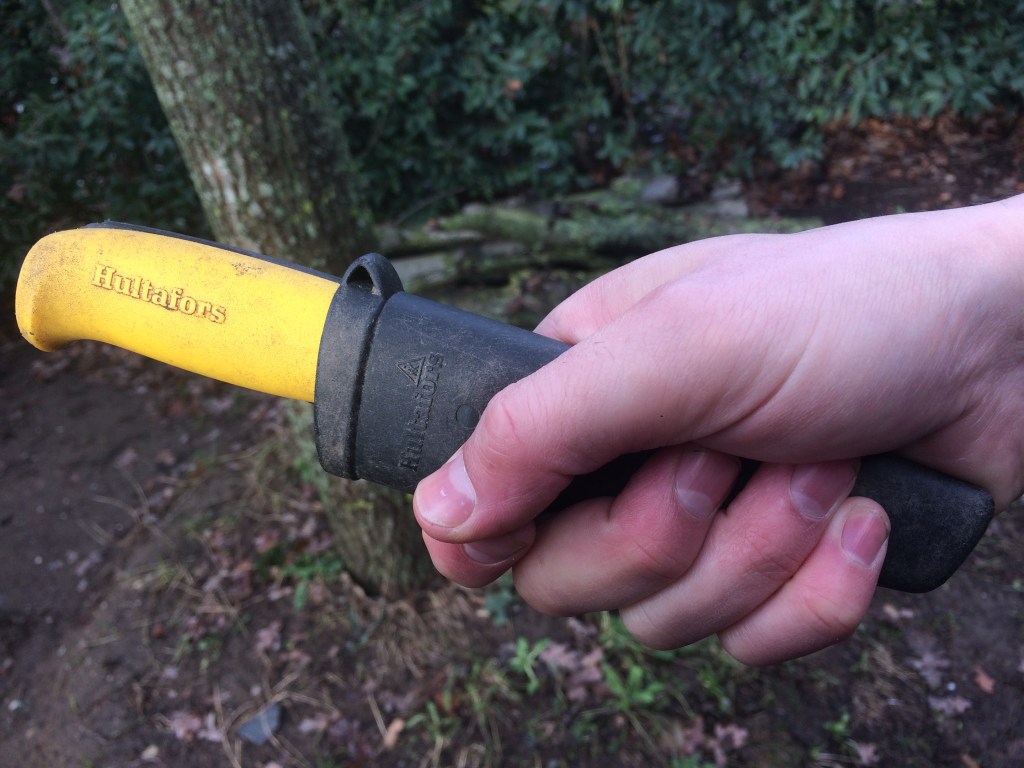
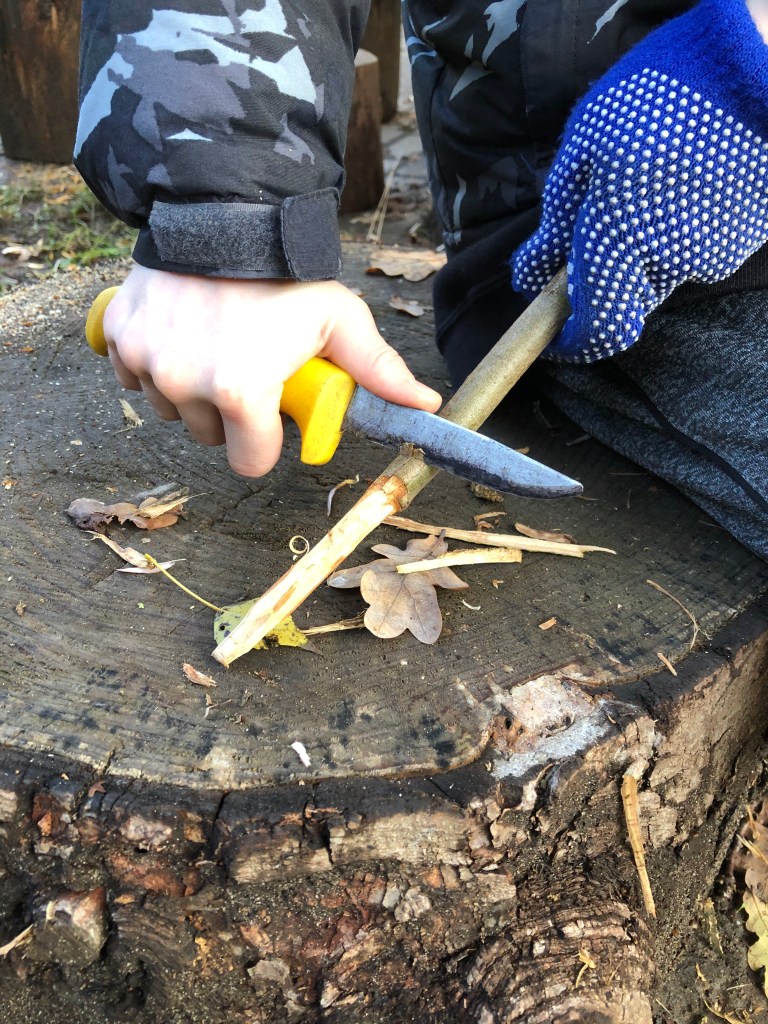
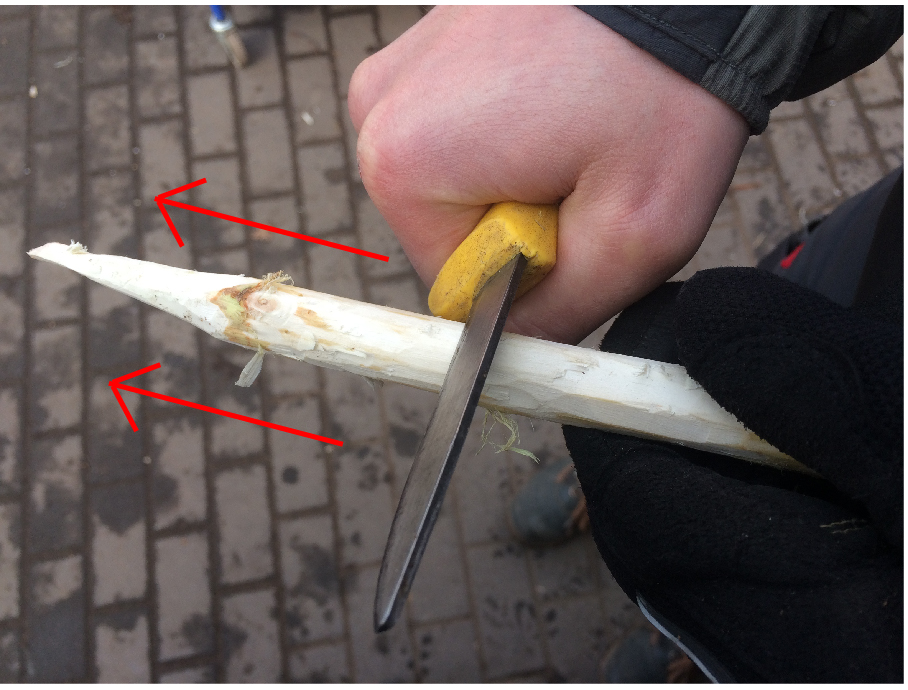
6) The Grip
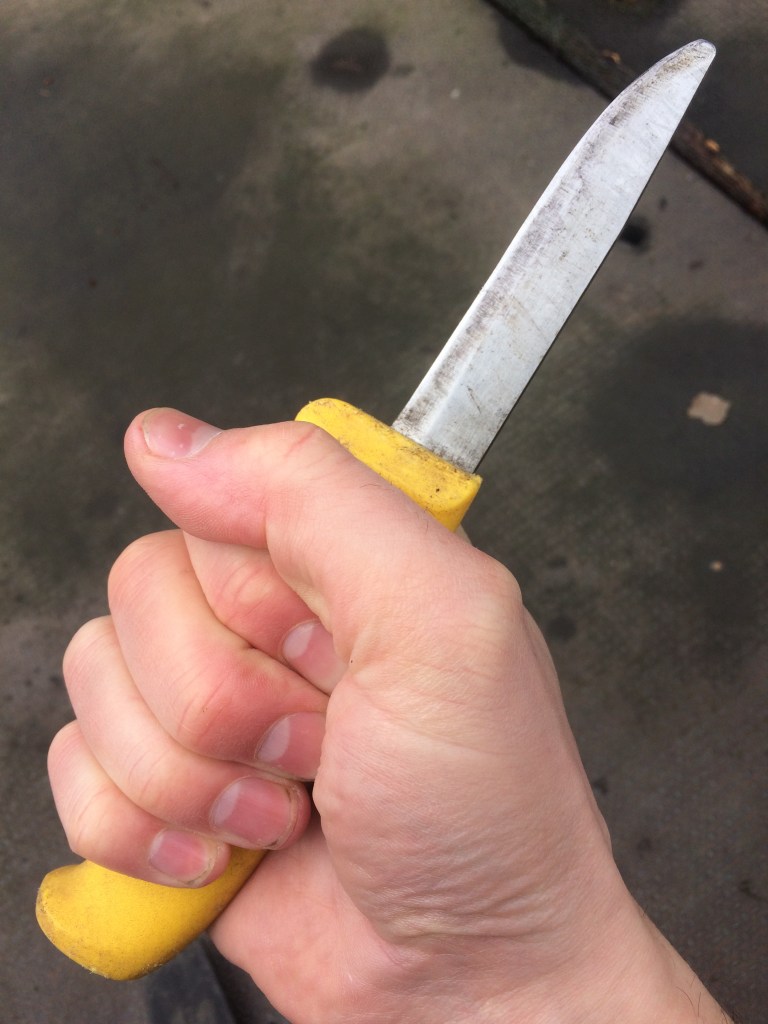
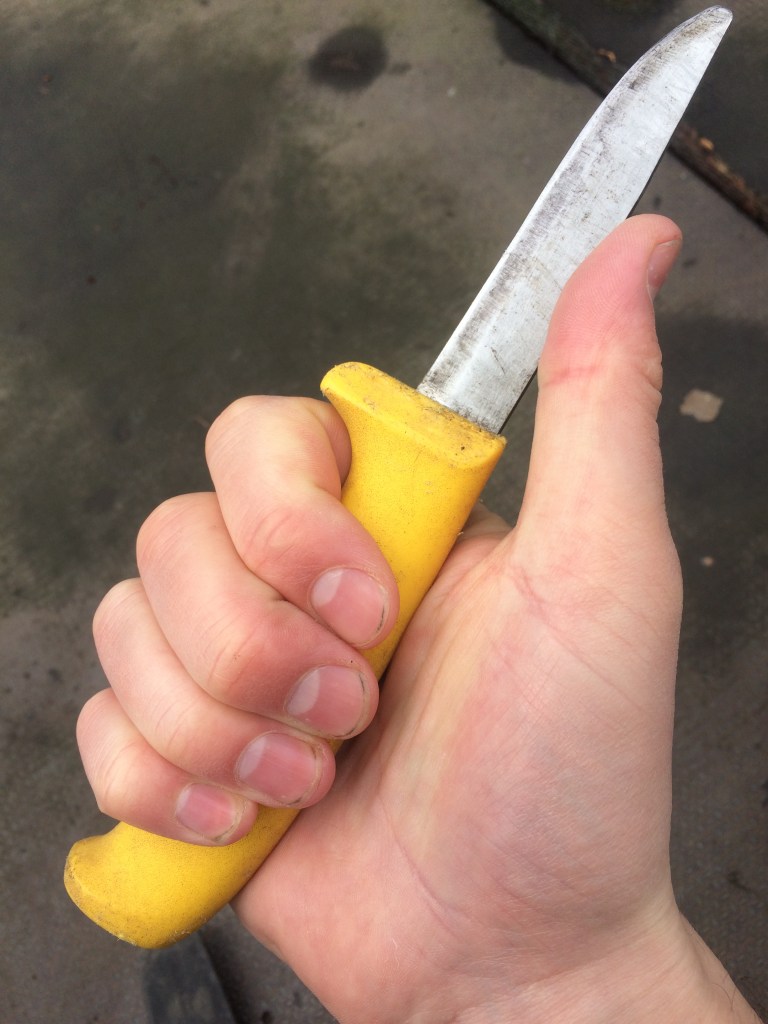
We encourage holding the knife in a fist, as close to the blade as possible while keeping all fingers on the handle. Thumb on the back of the knife comes down to personal preference and comfort. Fingers should not creep onto the guard part of the handle.
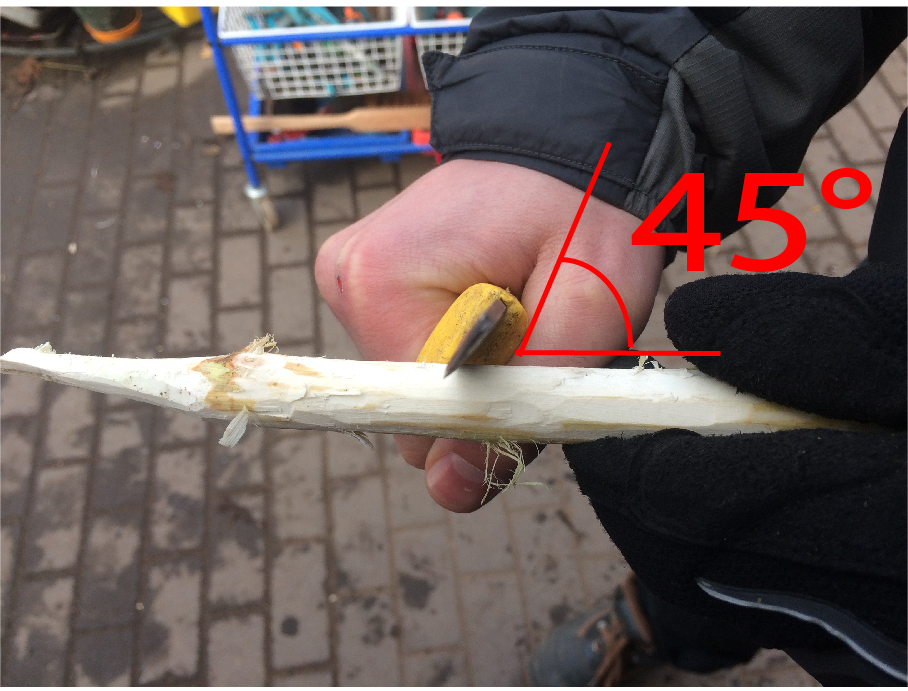
A Word on Technique
To begin with, we encourage students to always carve with the blade at roughly a 45 degree angle and away from their body. In an early years setting, potato peelers can be used to teach this motion.
There are other types of cuts that students can learn once they start to develop more confidence in using a knife. These will involve experimenting with cutting in different directions.
And finally…
No matter how much discussion you’ve had and how many times you have demonstrated the correct technique, accidents happen. The knives are, and should be, sharp. After all of your safety chat, make sure that students know to come straight to you if they hurt themselves. And for goodness sake, be cool. Nothing strikes more fear into an injured child like panic or anger on the face of their teacher.
If you’re lucky enough to have a school nurse, great. Our nurse likes injured students to be delivered by an adult. If you are without a school nurse, know where your first aid kit is and how to use it.
